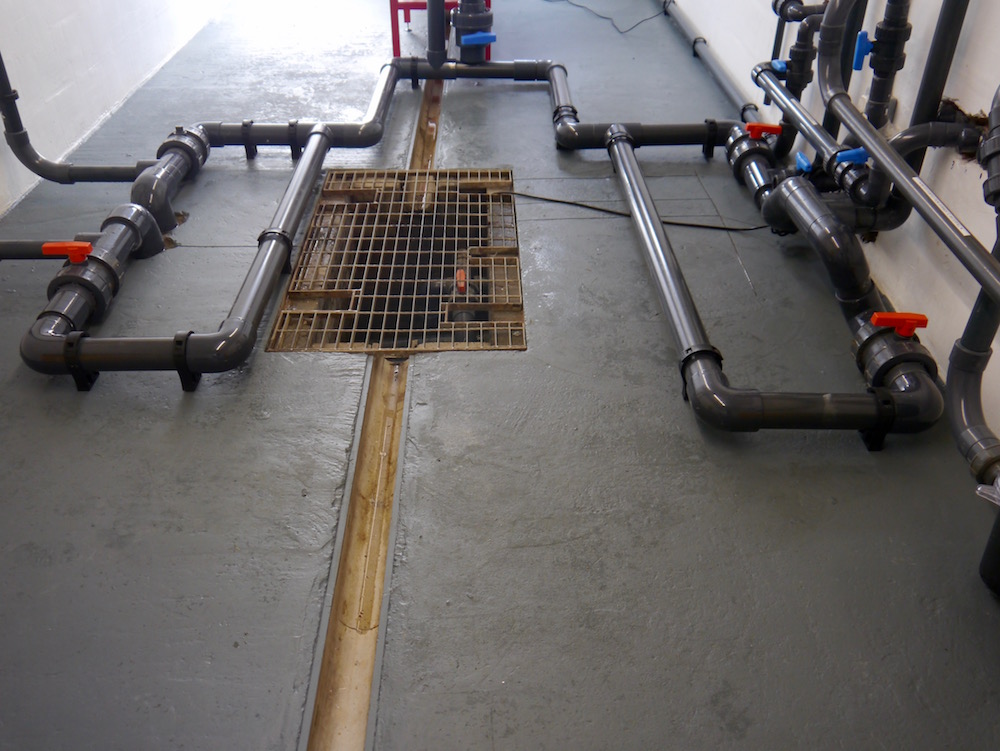
All that was left of the four 4” bottom drain lines were the four pipe stubs that entered the filter house.
To make matters worse, two of these entered through the wall on one side and the other two came up through the floor on the opposite side.
Of course it would be easy to attach a filter to each line and it would work like a dream – but that would have meant running four water pumps.
I needed something that would test my filters to the limit and also keep installation/running costs as low as possible.
Ian came up with the only answer that seemed reasonable to me – not perfect but reasonable, and that was to reduce all four lines to 3” bore and make a common manifold where all four lines could be controlled by 3” ball valves and be allowed to enter the filter on a single 3” line.
By then it looked something like this –
And of course there were a few hiccups along the way – always something to bear in mind when installing a gravity-fed filter and the sump pump decides to trip.
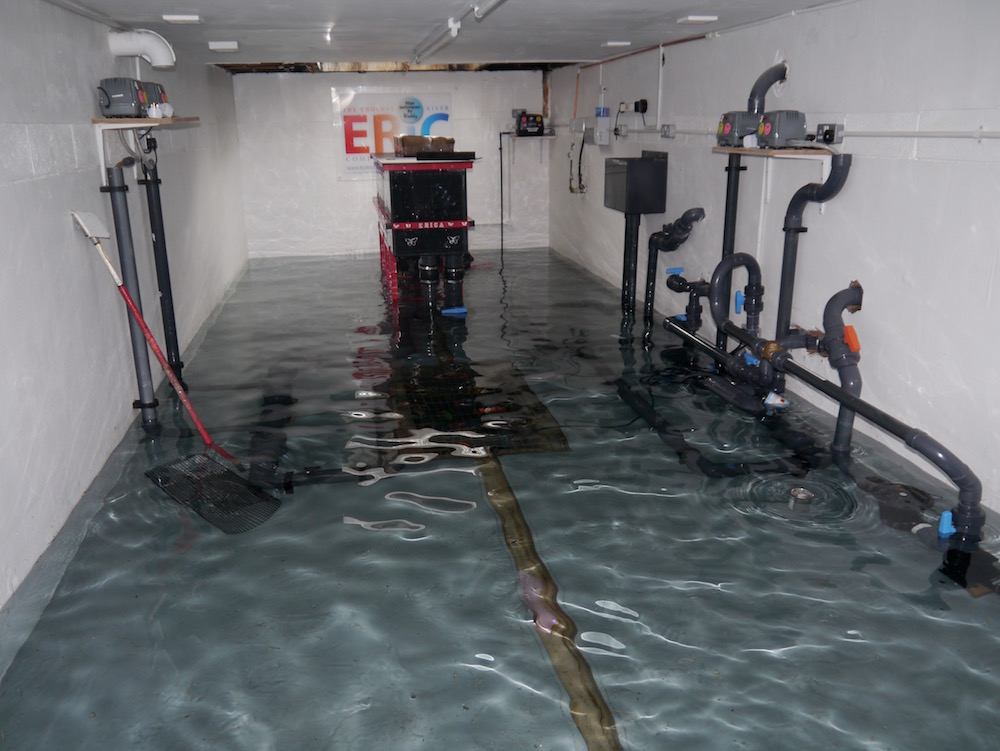
Of course, we really hadn’t a clue as to whether it would work or not, but in the event of failure – we could still revert to separate lines and separate filters.
Returning now to my Eric filters – I came up with the name ‘Eric’ after an abbreviation for ‘Endless River In Concrete’ believing at the time that an outer formed in concrete block was the cheapest way to produce the outer boxes.
We tried this once for a customer and the price turned out to be horrendous for the concrete base with underground pipe lines; time taken for the wall build, followed by rendering and finally glass fibre lamination.
That’s when I decided to have them ready-made for ease of transportation and speed of installation.
Like my earlier ‘Budget Filters’ I chose filter brushes for the mechanical stage and filter mat for the biological stage.
Regarding the brushes, improvements had to be made, so instead of suspending them from above the water, I tethered them firmly inside a removable box for periodic removal and cleaning if ever required. Since then I’ve discovered that the longer the brush box is left alone – the more efficient it becomes.
Now to the filter mat, the standard filter mat sheets that are blue/green in colour are manufactured by Enkev Ltd. but – and this has always been difficult to explain to others.
I need the water to ‘pass by and contact’ the surfaces as it passes by – rather than ‘going through’ them.
Standard thickness of the filter mat sheet is 38mm – far too thick to get more than seven widths of this material into my filters.
After several discussions with the guys at Enkev, we finally settled on a filter mat that is denser and firmer than standard mat and is only 10mm thick.
The eMat blocks now hold 25 sheets and the surface area is colossal.
As with the brush box, the eMat blocks are easily manageable and slide into tracks that can be removed easily if ever required.
The new pond kicked into life in 2011 and here is a shot taken in 2012 –

Originally we crossed our fingers and used the largest Eric Filter we had – this was the old E4 fabricated in clear PVC for monitoring purposes.
To my delight it turned out to be much bigger than was required so I decided to push the boat out further and replaced the clear E4 with a clear E3.
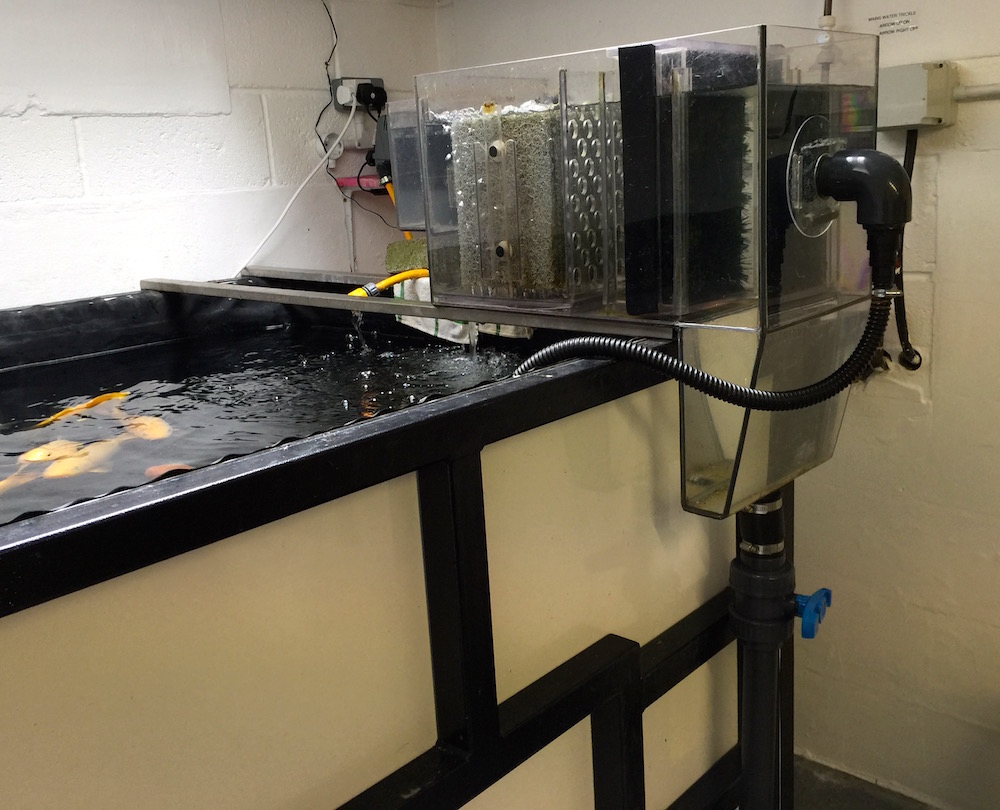
This is the one that’s filtering my pond right now –
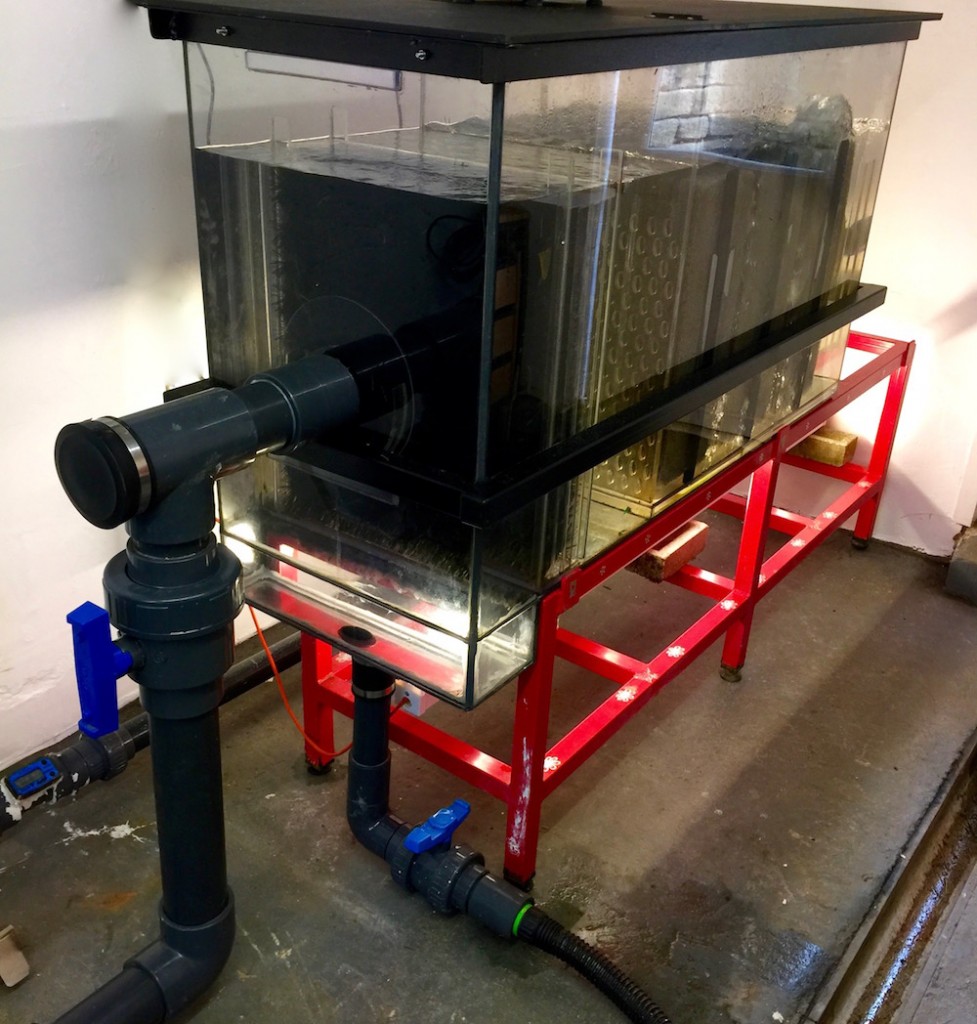
That’s it – tucked away in a corner of the filter house and contains only one brush box plus three eMat cartridge blocks!
I advertise that the E3 filter will handle up to 7,500-gallons of pond water, but in this case it’s handling 17,500-gallons of pond water!
(I’m now considering removing one cartridge block and see if I can push the boat out even further!)
A reminder to point out what I’m using now on the new Waddy pond –
1 x Clear E3 filter – gravity-fed, that only holds 90 gallons of water.
1 x low voltage Hailea water pump to power the filter – with a flow-rate of only 2,350gph.
2 x 80lpm air pump to give air to the filter and power the diffuser drain.
1 x 80w submersible U/V in the waterfall header tank.
1 x Hailea water pump to take water from the surface skimmer and then power the waterfall return.
That’s it – aside from the sump pump that’s float-operated.
A reminder – these are the total running costs for a 17,500-gallon Koi pond.
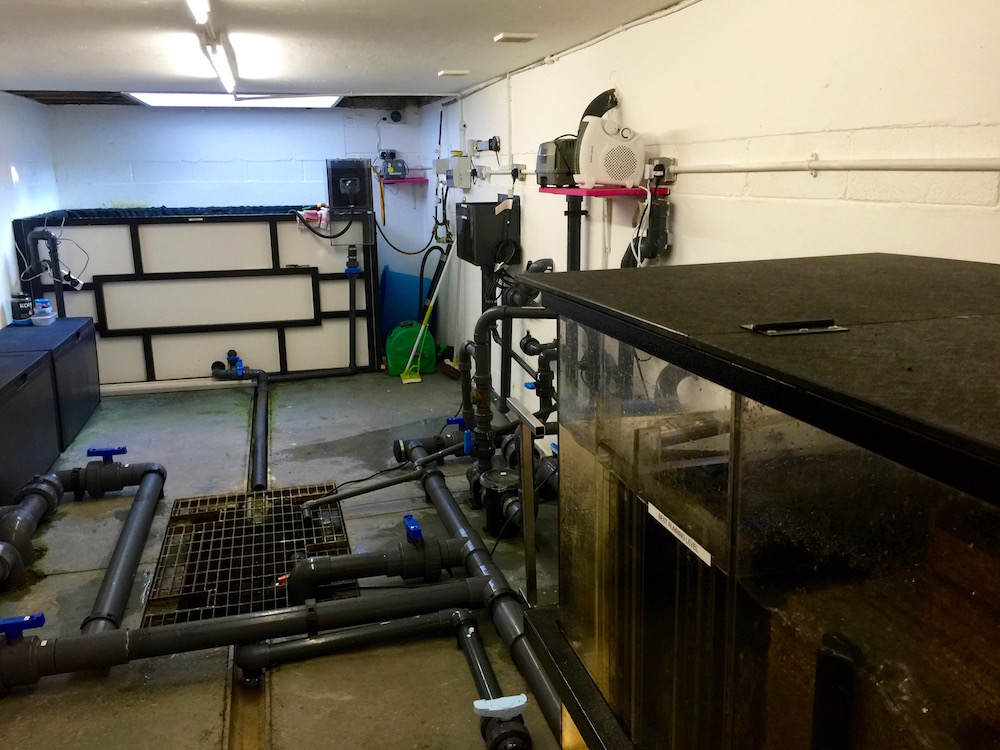
Now there is ample space in the filter house for an indoor system that’s filtered with a clear pump-fed Compact filter plus much storage for Koi-related items.
And the pond water sparkles!

My filter house is now a permanent test bed for all my Eric Filter systems.
However there’s no need to take my word for all this because, subject to prior arrangement, everyone is welcome to come and see it with their own eyes.
Now to detail the time taken to maintain the E3 filter – I close one 3” valve and switch off the water pump – this isolates the filter from the pond.
Next I open the 3” valve that purges 220-gallons of water from the four drain lines directly into the waste sump.
Once the waste sump is full, I shut off the 3” valve – open the 3” valve to the filter and switch on the pump.
Total time taken – (including the vital water change) – 3 minutes 45 seconds – most of the time spent is waiting time – twiddling thumbs.
Time taken (only) to thoroughly clean the E3 filter – just under 2 minutes.
The Compact filter takes 17 seconds for a total clean out.
After all this – Hilary now has her pond back!
Summary –
Space taken up – minimal.
Installation – simple.
Running costs – cheaper than chips.
Maintenance time taken – rapid.
Water quality – perfect.
Water clarity – perfect.
Finally, I have been supplying my filters for seven years now and still there’s not a single report where a new instance of Hikui has taken place!
Thanks for reading; I hope this has been of some use.

Waddy 20/01/16.